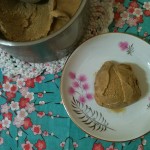
These pita breads are so versatile and easy, I just had to share them. We have had them as a burrito/taco substitute, but also in their intended form (cut open halfway around the edge to make a pocket, stuffed with anything you desire). We have stuffed them with leftover stroganoff, among other things. Today Mr T and I took a picnic lunch to one of my nearest and dearest during her lunch hour, and made wraps with these breads – hommus, grilled veg, and feta cheese. You can be as imaginative or as boring with fillings as you like. Mr T is coming to work with me tomorrow morning, so I’ll probably just spread one of these with our homemade peanut butter for his “sandwich”.
And the best part? They can be frozen once cooked. All in the same bag/container, without sticking together. They defrost quickly and perfectly (no soggy bread!), ready to stuff or spread with anything you have on hand. This is great for us. I can make a whole batch of them (makes 12 pita breads), keep them in the freezer, and grab a couple out when I need them. When you’re only cooking for a small number of people, the biggest budget-destroyer is wasted food. To have and use recipes like this one is imperative if you’re budgeting, and having these in the freezer will save you from needing to duck to the shops if you don’t have time to make a loaf of bread (saving time and money, and better for your health!).
Oh, and they’re also great for a quick pizza base:
So, without further ado…
Pita Bread
Ingredients:
15g fresh yeast
2 tablespoons olive oil
pinch of sugar (not rapadura; rapadura blocks yeast somehow)
500g unbleached bakers flour
1 teaspoon salt (fine sea salt; put it through a salt grinder, or mill it in a TM)
Water (about 300g)
Method:
1) Put 100g of water and the yeast in TM bowl. Warm for 3 minutes, 37 degrees, speed 3.
2) Add other ingredients to TM bowl EXCEPT remaining water.
3) Set TM to knead for 5 minutes. While it is kneading, slowly pour water in. You will need to stop adding water and check the consistency of the dough occasionally. You can either stop the machine, open the lid and grab a bit of dough to have a feel, or you can get a bit of dough out with the spatula while it is still kneading. You want a soft dough, workable, not too sticky. If you accidentally add too much water and the dough is too sticky, no dramas! You will just need to add a bit more flour and keep kneading in the TM until your dough is workable. Amount of water required depends on various factors (temperature and humidity on that day, type of flour, etc etc).
4) Put the dough in a large oiled bowl and set it in a warm place (covered with a tea towel) to double – about 1-1.5 hours.
5) Tip the dough onto a thermomat/silpat mat/floured surface and knock down. Knead quickly and divide into 12 sections. Roll the sections gently into balls, place them spaced apart on the thermomat/floured surface and cover with the tea towel. Leave them to rise for half an hour.
6) Preheat oven to 220 degrees celsius. Put a baking tray in (don’t bother lining with baking paper) to get nice and hot.
7) Move all balls but one to the side, and work on one at a time. Put the ball in the centre of your work surface. Cover with a square of baking paper, and flatten with a breadboard (you will need to apply significant pressure… or sit your toddler on the breadboard!) This gets the ball squished into a nice circle so you don’t end up with varying shapes. You may still need to roll the round out a bit more (you want rounds of about 16cm across), but it’s easier to make pretty circles if you squish the ball down first.
8) Put the first two or three rounds (depending on how many fit on your baking tray) on the hot baking tray and put the tray in the oven (not on the top rack – middle is best). Bake for 6-7 minutes, flip them over, and bake for 2 more minutes. If you overcook them, they will be crunchy and you won’t be able to fold them for wraps or cut them open to get pockets; they will just crack (see picture below). While the first lot is in the oven, continue rolling the other balls.
9) If using immediately, wrap in a tea towel on a dinner plate to keep warm. If not, put them in a plastic bag as soon as they are room temp or close, tie a knot in the bag and put in the freezer.
You can reheat defrosted pita breads in the oven (much lower temp or they will burn!), but I don’t find this necessary; I normally just eat them room temp after they have defrosted. They’re equally delicious!
It does seem like a bit of effort, with a double rise and having to cook in batches… but once you have a stack of these in your freezer, you will be so thankful you did it! Enjoy! 🙂


Leave a Reply